3D Rendering with Blender
Blender is a free, open-source 3D creation suite. Its Python API (bpy) allows you to create stunning photorealistic renders of FEA results — perfect for presentations, publications, and marketing materials.
Why Blender for CAE?
| Tool | Strength | Weakness |
|---|---|---|
| ParaView | Fast, scientific | Basic graphics |
| Matplotlib | Familiar, scriptable | 2D-focused |
| Blender | Photorealistic | Steeper learning curve |
For executive presentations or marketing materials, Blender renders stand out.
Example Output
Here's what you'll create in this lesson — a deformed tensile specimen with stress coloring:
Sponsored
3,000+ engineers placed at top companies in 2024
Mahindra, Bosch, TATA ELXSI, Capgemini and more
See Placement Stats
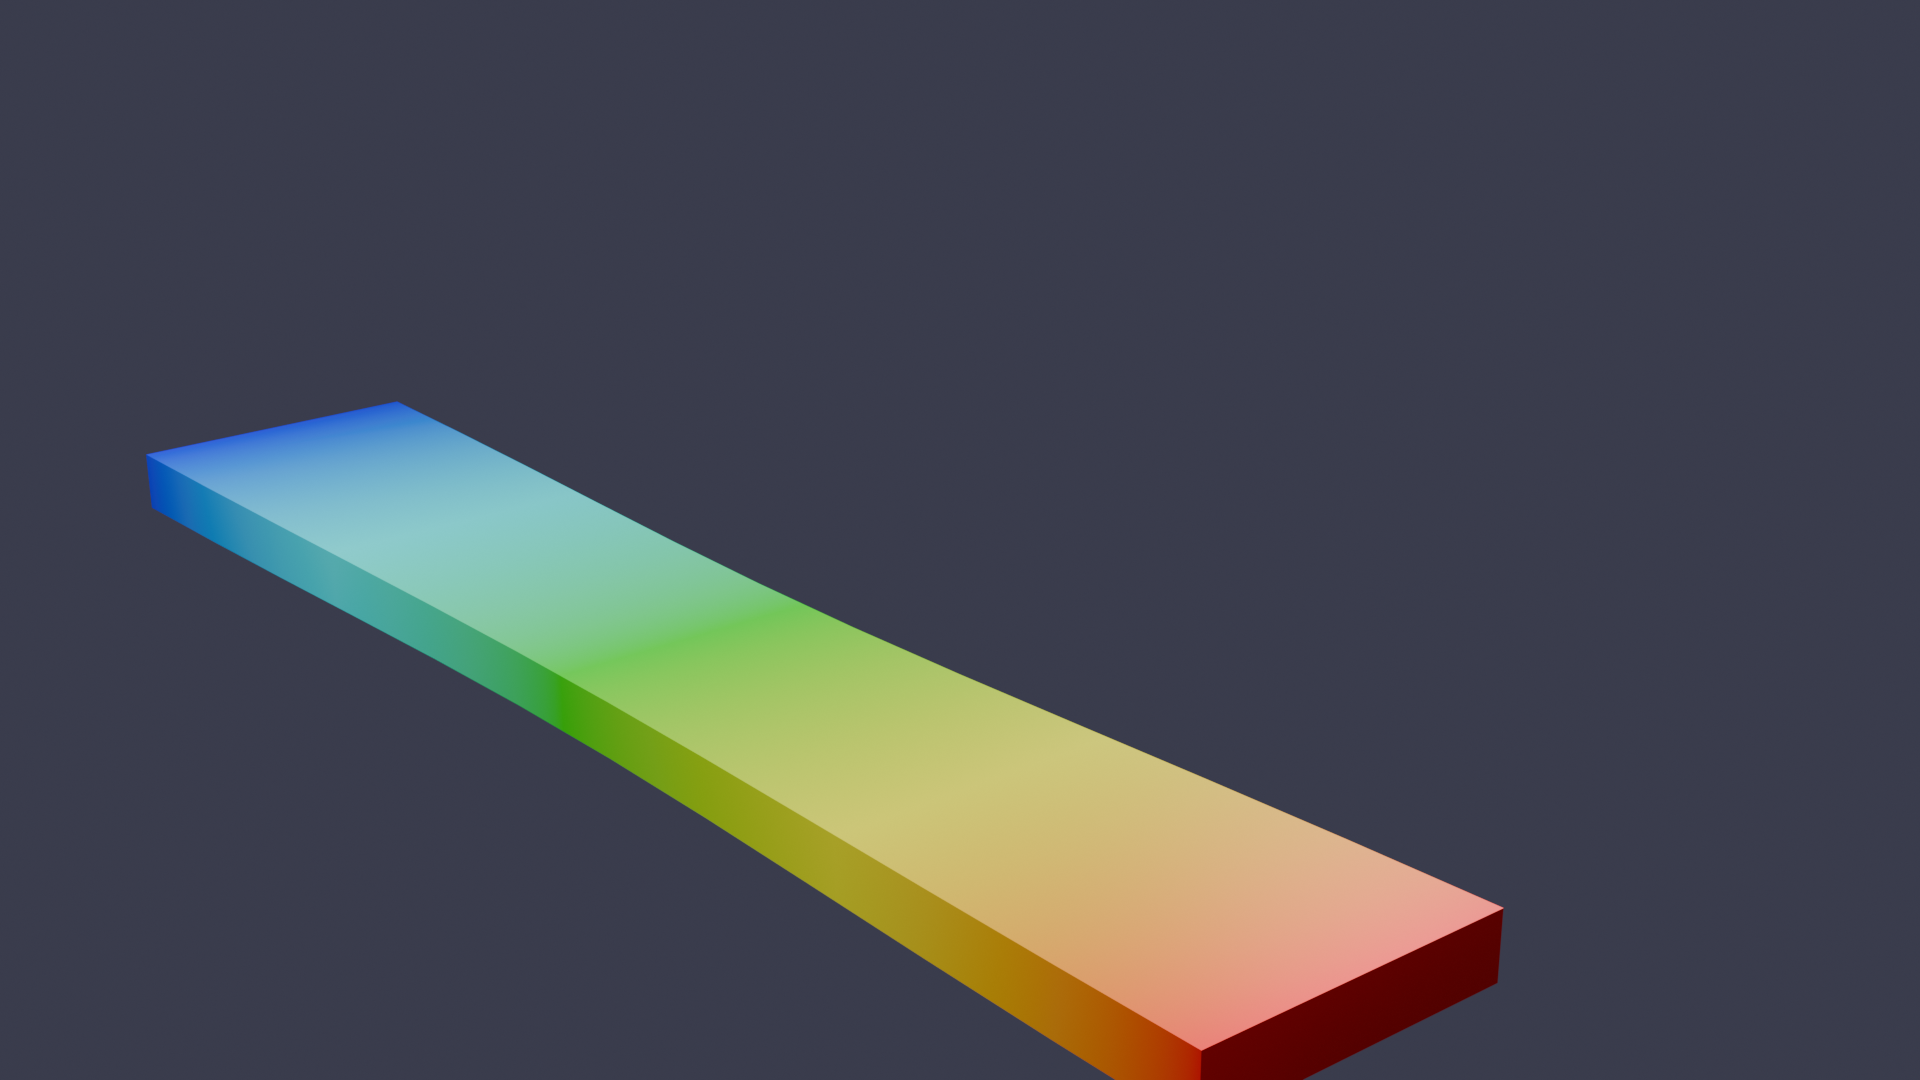
The render shows:
- Necking deformation at the center
- Stress colormap (blue = low, red = high)
- Professional three-point lighting
Installation
- Download Blender from [blender.org](https://www.blender.org/download/)
- Blender includes Python — no separate installation needed
- Run scripts from Blender's Text Editor or command line
Running Python in Blender
Method 1: Blender Text Editor
- Open Blender
- Switch to "Scripting" workspace
- Click "New" in the Text Editor
- Paste your script and click "Run Script"
Method 2: Command Line
blender --background --python myscript.pyBasic bpy Concepts
import bpy

# Delete all objects
bpy.ops.object.select_all(action='SELECT')
bpy.ops.object.delete()

# Create a mesh
bpy.ops.mesh.primitive_cube_add(location=(0, 0, 0))
cube = bpy.context.active_object
cube.name = "FEA_Element"

# Apply material
mat = bpy.data.materials.new(name="StressMaterial")
mat.use_nodes = True
mat.node_tree.nodes["Principled BSDF"].inputs["Base Color"].default_value = (1, 0, 0, 1)
cube.data.materials.append(mat)
Full Example: Deformed Tensile Specimen
This script creates a deformed tensile specimen with stress coloring:
"""
Deformed Tensile Specimen Visualization
Automotive Application: Seat belt anchor stress analysis
"""
import bpy
import numpy as np

# =============================================================================
# CONFIGURATION
# =============================================================================

LENGTH = 4.0          # Specimen length
WIDTH = 1.0           # Specimen width
THICKNESS = 0.2       # Specimen thickness
ELONGATION = 0.3      # 30% stretch
NECK_FACTOR = 0.5     # Necking intensity
RESOLUTION = 20       # Mesh resolution

OUTPUT_PATH = "/tmp/deformed_specimen.png"

# =============================================================================
# SETUP
# =============================================================================

def clear_scene():
    """Delete all objects in the scene."""
    bpy.ops.object.select_all(action='SELECT')
    bpy.ops.object.delete()

def setup_camera():
    """Position camera for good view of specimen."""
    bpy.ops.object.camera_add(location=(6, -4, 3))
    camera = bpy.context.active_object
    camera.rotation_euler = (np.radians(70), 0, np.radians(50))
    bpy.context.scene.camera = camera

def setup_lighting():
    """Add three-point lighting for professional look."""
    # Key light
    bpy.ops.object.light_add(type='AREA', location=(3, -3, 5))
    key = bpy.context.active_object
    key.data.energy = 500
    key.data.size = 3

    # Fill light
    bpy.ops.object.light_add(type='AREA', location=(-3, -2, 3))
    fill = bpy.context.active_object
    fill.data.energy = 200
    fill.data.size = 2

    # Rim light
    bpy.ops.object.light_add(type='AREA', location=(0, 4, 4))
    rim = bpy.context.active_object
    rim.data.energy = 300
    rim.data.size = 2

# =============================================================================
# GEOMETRY
# =============================================================================

def create_deformed_specimen():
    """Create tensile specimen with necking deformation."""
    # Create base mesh
    bpy.ops.mesh.primitive_cube_add(
        size=1,
        location=(0, 0, 0),
        scale=(LENGTH, WIDTH, THICKNESS)
    )
    specimen = bpy.context.active_object
    specimen.name = "TensileSpecimen"

    # Subdivide for smooth deformation
    bpy.ops.object.mode_set(mode='EDIT')
    bpy.ops.mesh.subdivide(number_cuts=RESOLUTION)
    bpy.ops.object.mode_set(mode='OBJECT')

    # Apply deformation to vertices
    mesh = specimen.data
    for vert in mesh.vertices:
        x, y, z = vert.co

        # Normalize x position (0 to 1 along length)
        x_norm = (x / LENGTH + 0.5)

        # Axial stretch (uniform elongation)
        new_x = x * (1 + ELONGATION)

        # Necking: reduce width at center
        # Gaussian-like profile centered at x=0
        neck_profile = np.exp(-8 * x**2 / LENGTH**2)
        width_factor = 1 - NECK_FACTOR * neck_profile * ELONGATION

        new_y = y * width_factor
        new_z = z * width_factor

        vert.co = (new_x, new_y, new_z)

    return specimen

def apply_stress_material(obj):
    """Apply stress-colored material based on vertex position."""
    mat = bpy.data.materials.new(name="StressMaterial")
    mat.use_nodes = True
    nodes = mat.node_tree.nodes
    links = mat.node_tree.links

    # Clear default nodes
    for node in nodes:
        nodes.remove(node)

    # Create nodes
    output = nodes.new('ShaderNodeOutputMaterial')
    output.location = (400, 0)

    principled = nodes.new('ShaderNodeBsdfPrincipled')
    principled.location = (100, 0)
    principled.inputs['Metallic'].default_value = 0.3
    principled.inputs['Roughness'].default_value = 0.4

    # Color ramp for stress visualization
    ramp = nodes.new('ShaderNodeValToRGB')
    ramp.location = (-200, 0)
    ramp.color_ramp.elements[0].color = (0, 0, 1, 1)  # Blue (low stress)
    ramp.color_ramp.elements[1].color = (1, 0, 0, 1)  # Red (high stress)

    # Add intermediate colors
    elem = ramp.color_ramp.elements.new(0.25)
    elem.color = (0, 1, 1, 1)  # Cyan

    elem = ramp.color_ramp.elements.new(0.5)
    elem.color = (0, 1, 0, 1)  # Green

    elem = ramp.color_ramp.elements.new(0.75)
    elem.color = (1, 1, 0, 1)  # Yellow

    # Geometry node for position
    geometry = nodes.new('ShaderNodeNewGeometry')
    geometry.location = (-600, 0)

    # Separate XYZ
    separate = nodes.new('ShaderNodeSeparateXYZ')
    separate.location = (-400, 0)

    # Map range to normalize position
    map_range = nodes.new('ShaderNodeMapRange')
    map_range.location = (-200, -150)
    map_range.inputs['From Min'].default_value = -LENGTH/2 * (1 + ELONGATION)
    map_range.inputs['From Max'].default_value = LENGTH/2 * (1 + ELONGATION)
    map_range.inputs['To Min'].default_value = 0
    map_range.inputs['To Max'].default_value = 1

    # Connect nodes
    links.new(geometry.outputs['Position'], separate.inputs['Vector'])
    links.new(separate.outputs['X'], map_range.inputs['Value'])
    links.new(map_range.outputs['Result'], ramp.inputs['Fac'])
    links.new(ramp.outputs['Color'], principled.inputs['Base Color'])
    links.new(principled.outputs['BSDF'], output.inputs['Surface'])

    obj.data.materials.append(mat)

# =============================================================================
# RENDERING
# =============================================================================

def setup_render():
    """Configure render settings."""
    scene = bpy.context.scene

    # Use Cycles for realistic rendering
    scene.render.engine = 'CYCLES'
    scene.cycles.samples = 128
    scene.cycles.use_denoising = True

    # Output settings
    scene.render.resolution_x = 1920
    scene.render.resolution_y = 1080
    scene.render.filepath = OUTPUT_PATH

    # Background
    world = bpy.data.worlds['World']
    world.use_nodes = True
    bg = world.node_tree.nodes['Background']
    bg.inputs['Color'].default_value = (0.05, 0.05, 0.08, 1)  # Dark blue-gray

def render():
    """Render the scene."""
    bpy.ops.render.render(write_still=True)
    print(f"Rendered to {OUTPUT_PATH}")

# =============================================================================
# MAIN
# =============================================================================

def main():
    clear_scene()
    setup_camera()
    setup_lighting()

    specimen = create_deformed_specimen()
    apply_stress_material(specimen)

    setup_render()
    render()

if __name__ == "__main__":
    main()
Run with:
Sponsored
Srinithin now works at Xitadel as Design Engineer
Mechanical engineering graduate turned automotive designer
See His Journey
blender --background --python deformed_specimen.py